It was hard to decide what to make for this week's Iron Craft. It had
to be something having to do with travel. Well, as of a couple days ago
I decided to not buy any more crafty stuff..... Someday I'll show you
pictures of my craftroom and you'll understand....
I didn't have any 'travel' 'transportation' fabric so I thought I would
make something for my car. I definitely need a garbage bag to hang on
the back of my seat!!!! =)
Last week I bought this home decor (canvas-like) remnant at JoAnn's
for 50% off. It was the perfect piece for the project!
Here we go!
What you need:
~ Rectangle of fabric (Mine was 35inches by 13inches)
EDIT: Heavy fabric like canvas or home decor would be best because there is no lining for the bag.
~ Strip of fabric for handle ~ 2 inches by 14 inches or so
~ Clip ~ like one for suspenders
OR
Velcro (I just didn't have any on hand)
~ Optional ~ Boning
~ Sewing Essentials
Note ~ I am NOT a fan of cutting more pieces than I need. That's why I use
one long rectangle rather than two pieces. You'll be finishing the top edges
and then sewing the two side edges. The fold will the be the bottom of the bag.
1. Finish your short edges (the ones that will be the top of the bag).
I serged mine. You can also fold over twice and topstitch to encase
the raw edge.
2. Take the piece for your handle and, with right sides together,
sew the length of piece using a 1/4 inch seam.
sew the length of piece using a 1/4 inch seam.
ohhhh, Andrea's learning to take pictures.....
3. Turn your handle inside out using a pin at one end and
pushing it through. Press handle.
pushing it through. Press handle.
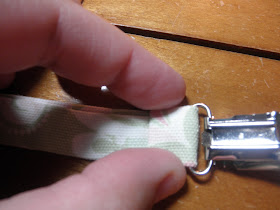
4. Put one of the ends into the suspender clip.
5. Fold it over twice to enclose the edge.
(I don't know why I didn't serge the edge! ah, well)
(I don't know why I didn't serge the edge! ah, well)

6. Sew down the end!!!!
My not-so-pretty sewing. At least it won't come off!
7. Boning!!! I did a bit of research before deciding how
to make this bag. I saw a few online with boning. What a great idea!
In the spirit of not going to the store, I used some boning from an old bridesmaid dress!!!! =) I felt so resourceful! =)
to make this bag. I saw a few online with boning. What a great idea!
In the spirit of not going to the store, I used some boning from an old bridesmaid dress!!!! =) I felt so resourceful! =)
8. Depending on how thick your boning is, you'll need to prepare
the edge. You'll be placing the boning in ONLY the front part
of the bag. (opposite the handle.)
the edge. You'll be placing the boning in ONLY the front part
of the bag. (opposite the handle.)
9. Fold over the edge that will have the boning and sew down to
make a channel. Double check that there's enough room to fit
your boning!
make a channel. Double check that there's enough room to fit
your boning!
10. Slide the boning into your channel!!! The boning itself should be
1/2 inch shorter than the entire edge to allow for s ewing the edges.
(1/4 inch on either side)
1/2 inch shorter than the entire edge to allow for s ewing the edges.
(1/4 inch on either side)
11. Fold over the opposite edge and sew down to finish the edge.
12. Attach the handle about 4 inches from the edge (not the boning edge).
13. No picture ~ Put right sides together (Line up your short edges)
and serge the pieces together on both long ends.
14. Topstitch next to the serge stitches to reinforce!
15. I like bottoms in my bags so I made corners! (optional)
16. Instead of cutting off the edge I serged it off! =)
Turn the bag inside out and voila!
Will you make one? If you do...
~ featured on One Pretty Thing ~


It certainly is pretty for a trash can!
ReplyDeleteThanks for this tutorial!! I have to drive alot in for my work, and trash ALWAYS seem to collect in my car! This would be an attractive solution...and easy to empty!
ReplyDeleteDeb
Hi from your newest gfc and pinterest follower. Saw you on linky party. What a great idea! Please pop by, Karima :) www.karimascrafts.com
ReplyDeleteAnd you do great tutorials! Andrea, I like you!
ReplyDeleteMake the strap shorter, and it can be looped around the gear shift lever that is on the floor/console.
ReplyDeleteAlso, i think i'd put boning in the top to help it stay open!
ReplyDelete