Thursday, October 27, 2011

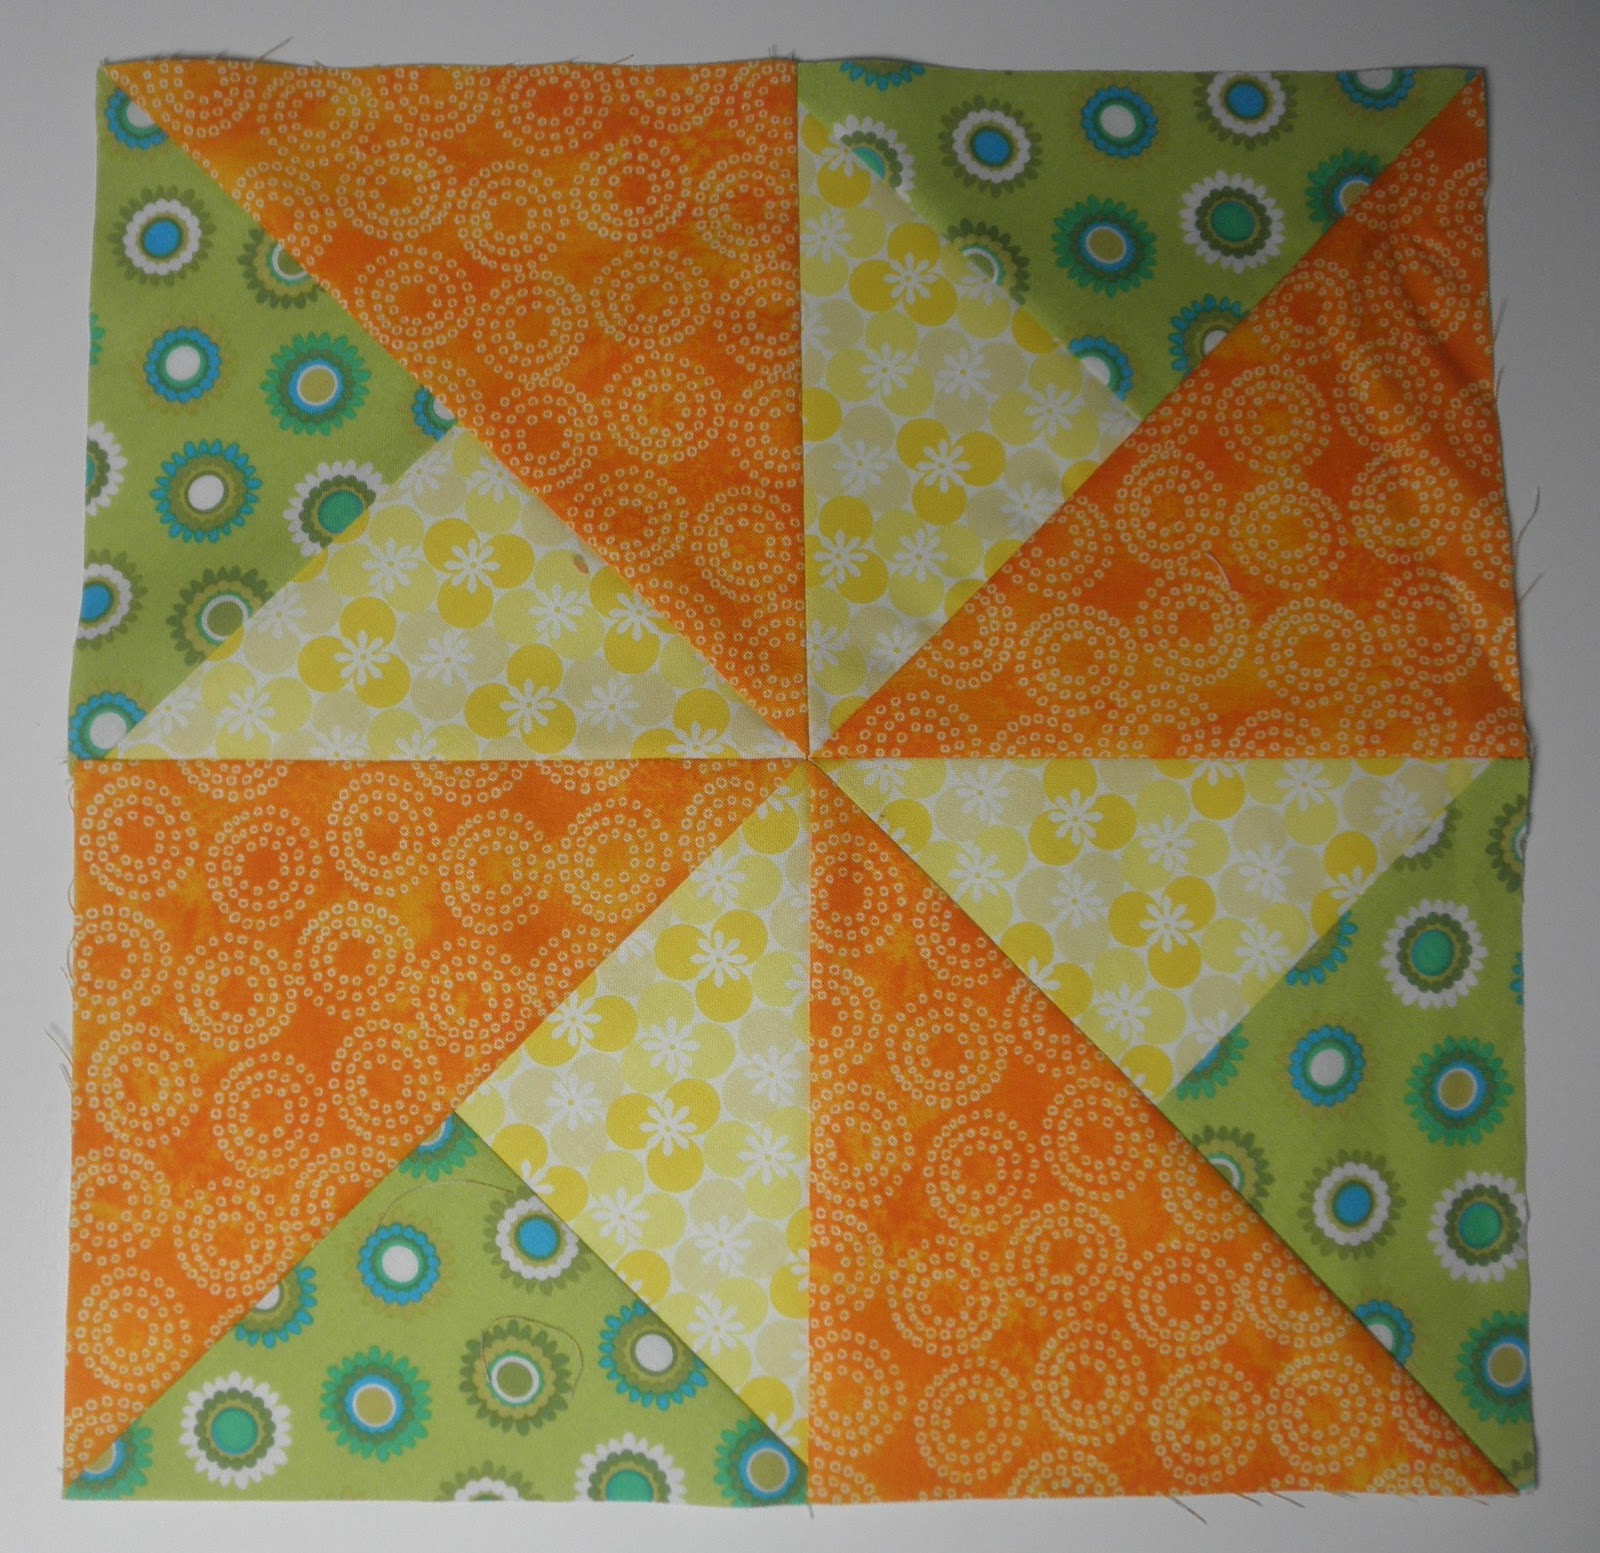
My Very First Block Swap!

As I look through blogs in my reader I keep seeing these things called 'swaps'.  They sounded awesome, and I really wanted to get involved.  I did some research on flickr and decided to join a group!


The group is called NuBees and is for people that are new to swaps, etc.  It is a month to month commitment so you can come in and out.   I love having that flexibility!


Everyone in my Hive picked the colors they preferred for their projects.  I picked out the fabrics and then I choose the block pattern!


I randomly found a picture of this block online.  It had no instructions so I just made up some myself.  =)  I love pinwheels and this variation was too fun to pass up!


My Half Square Triangle math did make my head hurt a little bit, but all in all it worked.  I feel like I did it without wasting too much fabric!  I hope the recipients of these blocks like them!


I've received two of my five blocks and I LOVE THEM!  I can't wait to show them to you after they all arrive!

Do you swap?  What's your favorite type of swap/bee?

Saturday, October 22, 2011

Sweet Scallops Totebag ~ FNSI ~ {Strap tutorial}


I have so many projects going right now... I'm sure I'm the only one, right? ha! Anyway, I wasn't sure what I wanted to work on for the Friday Night Sew In. I ultimately decided to do something for myself!!!  Kate of See Kate Sew put up a GREAT pattern for her adorable Sweet Scallops Totebag that you can get here

I've been envisioning the fabrics I'd use all week.   SO I went for it!!!  Kate's pattern and tutorial are awesome!!!  I only did a few things differently.

I had a great time picking my fabrics!!!  I marked the scallops instead of cutting them out.  I know its an extra step, but its just easier for me to sew these curves when the fabric is square, and not 'wiggly bias'.


I just kept sewing and sewing!  Yay curves!  =)


I then turned them inside out and clipped, etc.  Arranged and sewed them down just like Kate in her tutorial.

I used linen for my bag because I didn't have any home decor fabric.  To make it more sturdy I used some Pellon 911FF Fusible interfacing.  I don't know if that's the best for bags... its just what I had around!


I'm a bit picky about my straps.  I really like straps for bags to 'hold up'.  I like using pretty fabric and I don't want it all to 'bunch up' from use.

SO, this is how I make my straps!!!!!

I use 1 inch timtex and cut it to size (I did 34" for this bag... maybe a bit long for some, but I like them)

Then I cut my fabric 34 1/2 inches by 4 inches


Fold over the top edge 1/4 inch and press.


Then fold in half and press to create a crease.


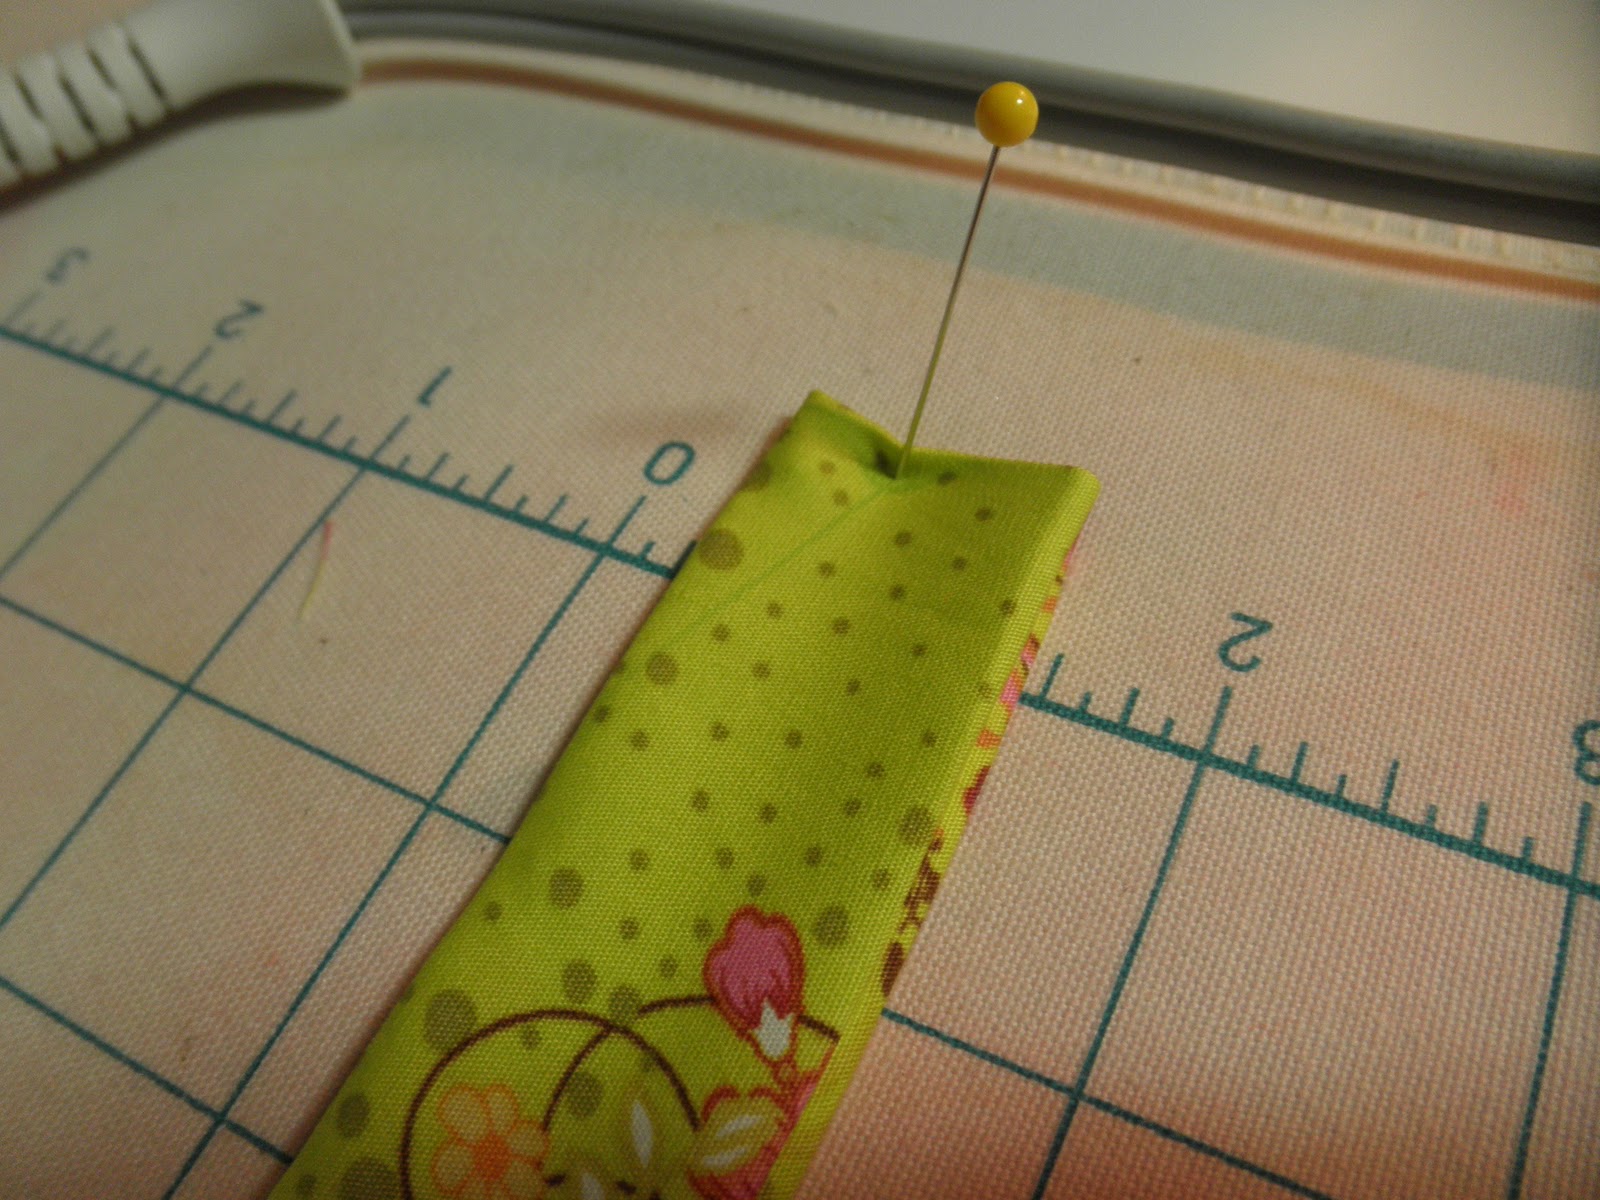
Open it up and press both edges into the center.  I don't go all the way to the crease... maybe just about 1/4 inch from the center crease.


Unfold everything and put your timtex under the 1/4 edge and along the center crease.


Fold over the right edge on top of the timtex.


Fold over the left edge towards the center.


Then fold on the crease!  Tada!


pin!


Repeat the same for the bottom.  Now you have a finished edge so you don't need to 'turn it under' when sewing to the outside of the bag.


Sew the entire length of the strap about 3/16ths from each edge.  =)

 
Sew down onto your bag, using an "x" or however you like to do it!

AND THE FINISHED BAG!!!  yay!!!!


View from the bottom


View from the side!


The back!!  I just couldn't leave it blank.
I used my sizzix and some fusible web to make circles from my scallop scraps.


So excited!  You should make one too!

Wednesday, October 12, 2011

Pumpkin Log Cabin Table Runner ~ IC 41

 I was sad to miss Iron Craft last week... I had a GREAT idea too... it just didn't happen.  sigh.

This week's challenge was Halloween!!!  I already made a Bling Bling Pumpkin... so what to do....


Well, about a week ago Kaelin over at The Plaid Scottie posted about a FANTASTIC Pumpkin table runner!!!  

She even included the pattern for FREE, download it here.  

It's so adorable I would have definitely paid for it....  =)  I've been itching to do it, and this week's iron craft gave me the perfect 'excuse' to work on it. 


It was really fun going through all of my scraps to find yellow, orange and brown.  I LOVE SCRAPPY projects.  =)

Kaelin uses linen as her background and it looks awesome.  I think that if I ever get a chance to make one for my mom I'll use linen.  I am just in love with this music note fabric I bought a while ago.  I seriously think I need to buy a bolt.  It's subtle gold music staff and such a beautiful creamy color.  =)


I found an awesome fabric scrap for the 'stem'.  It's got a lot of goldy/browny/orangey color in it.  I thought it would be perfect!  I think it turned out well.


More stems!

So far I only have this one block done.  I chose to start with the biggest pumpkin because I figured it would be the most fun.  yay!

Sunday, October 9, 2011

Knit & Crochet Dishcloths


On our Honeymoon we went to breweries annnnnnd quilt / yarn stores!  hehehe  At one really cool shop in Colorado I bought some beautiful yellow organic cotton yarn.  I intend to use it to make facecloths and baby washcloths for gifts.

I've never really made any before so I bought some (much cheaper) Bernat cotton yarn on sale at JoAnns.  I wanted to try out patterns before using my 'good yarn'.  
On our mini roadtrip last weekend I crocheted/knitted a few.

What do you think?

They were all pretty easy, but I learned that I crochet faster than I knit. huh.
 

 The one above seems to be the 'favorite' of people who make these.  It's called Grandmother's Favorite and can be found here on ravelry.  This knits up really quick.  I mistakenly did it first with a size 6 needle.  It was a little small and just too tight to knit.  I made another using a size 8 and it worked much better.  I think I could even use a 10 and still be happy with it.  It's soooo soft.  I'm excited to try it out!
 

The orange one is crochet.  It has an 'x' in it that makes it a bit nubby.  You can get the pattern here on ravelry.  It's a decent sized washcloth.  It's also pretty thick.
I would make it again for sure!


This is definitely the pattern that I'm going to use for the baby washcloths.  It's call the "Oh So Soft Baby Washcloth" and you can find it here on ravelry.  It's crochet and soooo fast.  I think it's pretty, and not too stretchy.  It also has just enough 'nub' and thickness to it.  I gifted this one to my sister and she's going to report back.  I made another one really quickly (out of the organic yellow yarn) and gifted it to another friend who is also going to report back.  {I gave it to her right after I finished it... so sorry there's no picture!}  I'm interested to hear how much they shrink in the wash.


 I think I liked making this one the best too... that's why it gets more pictures.


Close up!


I also made one more.  The picture didn't turn out during the day, and so that's why this one was taken at night!  It it very nubby. 
 
 {nubby close up}

It's so cute!!  I do wonder how the 'nubs' will hold up over time.  This one is also crochet, and you can find the pattern here on ravelry.  This is my husband's favorite.

And there is my 'study in dish/washcloths'.
What are your favorite cloths?  Knit or crochet?  =)

Thanks for stopping by!

Thursday, October 6, 2011

Not just your normal headbands!


For a while now I've had this idea brewing... How much fun would it be to have headbands with interchangeable embellishments???  Wouldn't that be so fantastic?!?!?!  I decided to try it!


My niece just recently became a 'big sister', and so she needed an appropriate 'big sister' gift!  I found four headbands in a package together at Target.  They were perfect for my idea because they had little rubber 'grippys' on them!  What a great way to keep the embellishments in place!!!


SOOOOOooooo I took some of my Flowers that were left over from my other headband project, and sewed a small piece of felt (really it was a scrap piece of warm&white... i just think felt would work better) onto the back.  This created a little 'channel' that would make it slide onto the headband.  yay!

I also saw this adorable idea for a pleated embellishment.  In the tutorial she glues it to the headband..... I did not.  I also made my 'channel' a smaller width so that it would be more likely to stay on the headband without glue. 


I did cheat, because in the tute she uses the same fabric for the upper pleat and lower channel... I was just using my scraps to make these, so I was without enough fabric to make the one below.  I found a piece of scrap muslin and it worked great!  I trimmed it down so it would not be seen when she wears the headband.  


This is so fun, because as my niece gets older she can just buy bigger headbands!  These will still fit!  and I can keep giving her more embellishments as needed.  I'm sure she needs a ric rac flower, and a crochet flower, oh the possibilities!


Have a great day!!!!