Showing posts with label IronCraft. Show all posts

Wednesday, October 12, 2011

Pumpkin Log Cabin Table Runner ~ IC 41

 I was sad to miss Iron Craft last week... I had a GREAT idea too... it just didn't happen.  sigh.

This week's challenge was Halloween!!!  I already made a Bling Bling Pumpkin... so what to do....


Well, about a week ago Kaelin over at The Plaid Scottie posted about a FANTASTIC Pumpkin table runner!!!  

She even included the pattern for FREE, download it here.  

It's so adorable I would have definitely paid for it....  =)  I've been itching to do it, and this week's iron craft gave me the perfect 'excuse' to work on it. 


It was really fun going through all of my scraps to find yellow, orange and brown.  I LOVE SCRAPPY projects.  =)

Kaelin uses linen as her background and it looks awesome.  I think that if I ever get a chance to make one for my mom I'll use linen.  I am just in love with this music note fabric I bought a while ago.  I seriously think I need to buy a bolt.  It's subtle gold music staff and such a beautiful creamy color.  =)


I found an awesome fabric scrap for the 'stem'.  It's got a lot of goldy/browny/orangey color in it.  I thought it would be perfect!  I think it turned out well.


More stems!

So far I only have this one block done.  I chose to start with the biggest pumpkin because I figured it would be the most fun.  yay!

Wednesday, September 28, 2011

Drawstring Bag Tutorial ! ~ IC 39

Iron Craft this week we were challenged to make something that will hold something else.  I've been needing a drawstring bag to hold all of my knitting for a while now.  I made this bag really 'tall' so that my knitting needles would fit!

 Here's a quick tutorial so you can make them too!  Drawstring bags are MY FAVORITE 'go to' bag!!!!  It only took me about 15 minutes to make this!  This is a great alternative to wrapping paper too!


I cut ONE piece of fabric for this bag.  The short ends are my TOP. 

sooooo you'll cut your fabric 2x the finished length by the width.  You also have to account for seam allowance and 2" per top side to create the channels for the string.

example:
If you want a finished bag that's {6" wide X 10" long} then you would cut a piece that's {7" wide (6" plus seam allowance) X 24" long (10"x2 + 4" for channels)}.  

Hopefully that makes sense!!!!


Serge around the entire piece to finish the edges! (If you don't have a serger just zigzag!)


Fold over one of the TOP edges (short edge) one inch and press (or if you are lazy, like me, you don't really have to press.)


Sew your channel down just on the other side of the finished edge.

Repeat for the other end!


Put right sides together with both channels matched up!


Sew down each side.  I use a 1/4" seam allowance.  Be sure to backstitch at the beginning and end.  I start sewing at the FOLD.  When you reach the top DO NOT SEW the channel.  Just backstitch right before it!!!

Repeat for other side, starting at the fold and sewing to the channel.


Bag turned inside out!


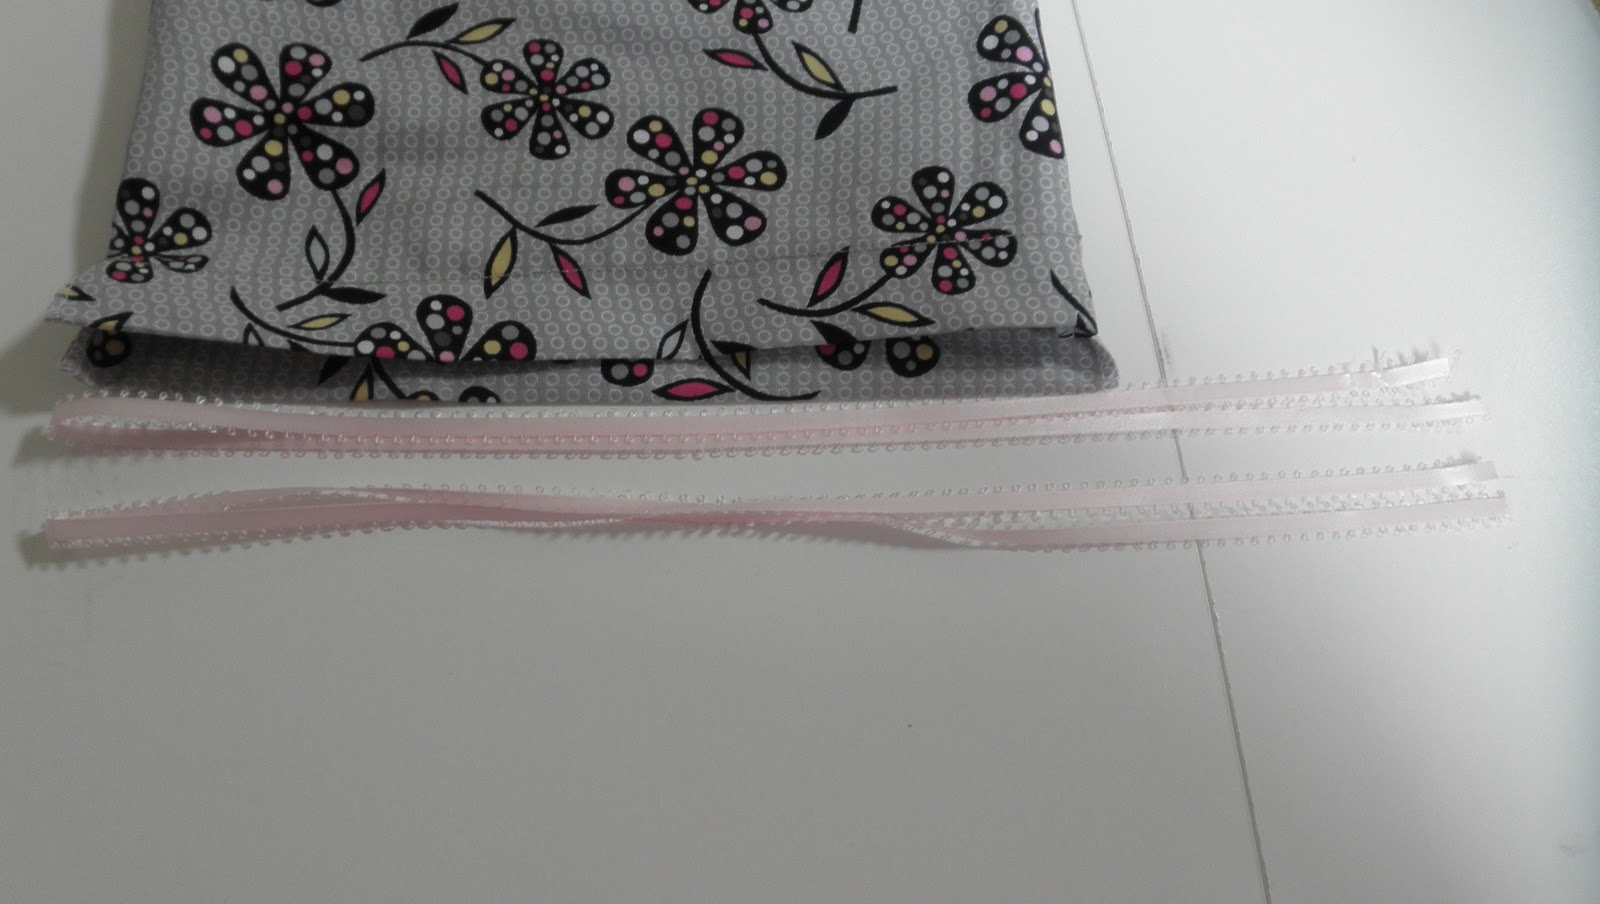
Cut two 'drawstrings' double the width and about 2-3 inches longer on both ends.  So if your width is 10 inches then your drawstrings will be around 26 inches each.


Get your trusty safety pin!


Feed through the channels!


Even up the two ends and tie a knot.


Take your other drawstring and start at the OPPOSITE end from the one you just finished!  (feed through and knot...)


Trim the edges of the drawstring and 'fray check' if you need to!


yay!!!  It holds my huge ball of yarn and my long knitting needles!


View from the inside!!!

=)

Wednesday, September 21, 2011

Black & White Music Quilt ~ IC 38

Iron Craft is so fun!  This week we were challenged to use black and white.  I decided to do another unfinished project from when I was in high school.  (I'm not sure if I'm bending Iron Craft rules by doing a UFO... I promise next week will have nothing to do with quilting and will be a brand new project!)  


I started making this wall hanging for a teacher of mine... then, sadly, I figured out that this teacher wasn't as supportive as I thought she would be.  Needless to say, I didn't finish it back then, and she won't be getting it now!  =)  


When I was younger and started to quilt I was always looking for the next challenge.  I very rarely used a pattern.  Most of the time I dreamed up ridiculous patterns and did not iron properly when piecing.  This wall hanging is a result... although I should say that I do like the design!!  I can tell you (because I remember how I used to think) that this started on graph paper and was a nine patch.  Then triangles were added because I think they are cool, and they are 'harder' than squares.  Then the nine patch was turned on an angle to allow more triangles around the edges.  If I had more time I'd rummage through my papers to find the design.... maybe later....

Please don't look to see if the corners are all perfect and matching, because they aren't!  The small squares you see are 1 inch squares.


I quilted it a tiny bit because I didn't want to take away from the piecing and the already 'black and white'ness of the quilt.

Added binding and tada! done!

I have to confess that I cheated a bit on the binding.  Normally I sew my binding onto the quilt top and do a hidden stitch by hand on the back.  Lately, as I read more sewing blogs, I've learned the awesomeness of topstitiching.  So I folded the back onto the front and topstitched all the way around.  All in all it worked pretty well, and I'm going to hang it in my music room!

Thanks for stopping by!

Wednesday, September 14, 2011

Mini Log Cabin PaperPieced Quilt ~ IC 37 Shrink to Fit

Sadly, I missed IC last week.  I was in New Jersey for my best friend's wedding!  (it's so fun and sneaky to 'schedule' posts!) hehehehe.  I actually made that shirt with the white flowers for the rehearsal dinner!


Anyway, I was worried I'd have to miss this week too and THEN I remembered that I had mini quilt blocks somewhere.....  Luckily, since I've been organizing my craftroom... I COULD FIND THEM!  hehehee 

One of the cute scrappy blocks!

And another!

When I first started quilting I did LOTS of miniature... more just because I wanted the challenge.  My gram bought these log cabin paper piecing squares for me.  I went to work!  Cutting bitty strips and paper piecing away.  Eight of them were done so I sewed them together and put a scrappy boarder on!


I messed up the log cabin design... or did I mean it to be that way... hmmm


What should it be??  a purse?  a mug rug?  thoughts??????  
I'm thinking probably a mug rug!

Wednesday, August 31, 2011

Flirty Flower in a Shadow Box ~ Iron Craft 35

Iron Craft is so much fun!  This is my third week, and I find that it helps me to 'think outside the box'.  =)  This week's challenge was "Done Reading?".  My husband is a huge book nerd, and I'm a sort of book nerd.  That being said, it was hard for me to ruin a book to create something new... I know it sounds weird, but its the truth!!! 

We JUST donated a ton of books to Goodwill last week, so where was I going to get my book?  Then I remembered that there were still some Romance Novels hanging around.  I thought... that might be kind of fun and silly!!!


I started by just randomly making paper flowers, etc.  I folded them accordion style.  Then folded that in half and gluesticked the sides together.


On the one above I cut a rounded edge on the ends when they were smashed together (like making a snowflake).


An attempt to make a wind up rose.  It should have been thicker....


Still looks cute though!


Colored the creases pink for fun.


Fan flower with blue in the creases and its own stem.


Horizontal words look better.  This one was also folded a thin width.


A new idea...


And now the actual project.

Flirty Flower in a Shadow Box


My husband came in when I had all of these flowers on the table and I wasn't sure what to do with them.  He immediately said "put them in a shadow box!"  DUH!!!!  Because of his genius I let him pick the button.  =)


A fuzzy'ish' picture of the words in the 'grass'.  It's entertaining if you want to zoom in.  Over 18 only please (lol).


A fun, flirty, project.  =)

Wednesday, August 24, 2011

(Pretty) Car Garbage Bag with Tutorial ~ Iron Craft 34


It was hard to decide what to make for this week's Iron Craft.  It had
to be something having to do with travel.  Well, as of a couple days ago
I decided to not buy any more crafty stuff..... Someday I'll show you
pictures of my craftroom and you'll understand....

I didn't have any 'travel' 'transportation' fabric so I thought I would
make something for my car.  I definitely need a garbage bag to hang on
the back of my seat!!!!  =)

Last week I bought this home decor (canvas-like) remnant at JoAnn's 
for 50% off.  It was the perfect piece for the project!

Here we go!

What you need:
~ Rectangle of fabric  (Mine was 35inches by 13inches)
EDIT: Heavy fabric like canvas or home decor would be best because there is no lining for the bag.
~ Strip of fabric for handle ~ 2 inches by 14 inches or so
~ Clip ~ like one for suspenders
        OR  
   Velcro (I just didn't have any on hand)
~ Optional ~ Boning
~ Sewing Essentials

 Note ~ I am NOT a fan of cutting more pieces than I need.  That's why I use
one long rectangle rather than two pieces.  You'll be finishing the top edges
and then sewing the two side edges.  The fold will the be the bottom of the bag.

1. Finish your short edges (the ones that will be the top of the bag).
I serged mine.  You can also fold over twice and topstitch to encase
the raw edge.

2.  Take the piece for your handle and, with right sides together,
sew the length of piece using a 1/4 inch seam.

ohhhh, Andrea's learning to take pictures.....

3.  Turn your handle inside out using a pin at one end and
pushing it through.  Press handle.

 4. Put one of the ends into the suspender clip.

5.  Fold it over twice to enclose the edge.
(I don't know why I didn't serge the edge! ah, well)

6.  Sew down the end!!!!

My not-so-pretty sewing.  At least it won't come off!

7.  Boning!!!  I did a bit of research before deciding how
to make this bag.  I saw a few online with boning.  What a great idea!
In the spirit of not going to the store, I used some boning from an old bridesmaid dress!!!!  =)  I felt so resourceful!  =)  

8.  Depending on how thick your boning is, you'll need to prepare
the edge.  You'll be placing the boning in ONLY the front part
of the bag.  (opposite the handle.)


9.  Fold over the edge that will have the boning and sew down to
make a channel.  Double check that there's enough room to fit
your boning!

10.  Slide the boning into your channel!!!  The boning itself should be
1/2 inch shorter than the entire edge to allow for s ewing the edges.
(1/4 inch on either side)


11.  Fold over the opposite edge and sew down to finish the edge.

12.  Attach the handle about 4 inches from the edge (not the boning edge).

13.  No picture ~ Put right sides together (Line up your short edges)

and serge the pieces together on both long ends.

14.  Topstitch next to the serge stitches to reinforce!

15.  I like bottoms in my bags so I made corners!  (optional)

16.  Instead of cutting off the edge I serged it off!  =)

Turn the bag inside out and voila!


Will you make one?   If you do...


~ featured on One Pretty Thing ~