Monday, March 19, 2012

Disney Party!

As you saw in yesterday's post, I threw a Disney themed party a few months ago.  I had some fun with the decor.  It was by no means elaborate, but it made me happy!


I found a beautiful piece of fabric in my stash and draped it over a card table, and a book shelf.  
Pez Jasmine made an appearance on a mirrored candle plate.
 

I searched and then downloaded the Disney font online!  I love downloading fonts.  I paid for one for my wedding invites and it was totally worth it.  The Disney one was free.  I don't remember the site, but I do remember praying that I wasn't downloading evils things with the font.... luckily it all worked out!


I had fun making signs.  Everyone knew what everything was, but Disney signs are too much fun! 

  
More Disney signs!
 

I stuck the Mickey oreos in the Scotcheroos to have them stand up!  It was like a fun double treat for everyone!


I put a mini vase inside of the big vase, and then filled it with hershey kisses.  It was fun to have the tall bling coming out of the kisses!


Most of the food out on the table.  There were jewels thrown about.  I did do some leveling, but you can't really see it in the picture!  Again, taking pictures too fast.... guests were almost arriving!


I had a great time making this banner.  I used my Sizzix Bigshot to cut out all of the circles.  I added some bling to yellow paper.  I used pinking shears to cut the triangles out.  The little blue circles that connect the banner flags are connected with brads.  That makes it easy to fold up!

Saturday, March 17, 2012

Mickey Mouse Cookies on a Stick!

Mickey Mouse Oreos!!!!

Back in Nov/Dec (I can't even remember) I threw a party for my friend who happens to be a Disney fanatic.  I knew I had to have some Mickey Mouse cookies on a stick!  

I used this tutorial ... at Studio D for the idea. Check it out for full instructions.


The ingredients!  (although I would use what ...at Studio D uses!)  I didn't have time to go get the Wilton Chocolate melts... the Bakers chocolate was okay, but the consistency was wrong.  Next time I'll definitely use the Wilton ones.


The setup!


Oreos separated.  I found that if I microwaved them for a few seconds they were much easier to separate!


I taped down wax paper for my work surface.
 

On a cookie sheet ready for the fridge!


After I put them in the fridge for a bit, I covered them in the chocolate.  Somehow I don't have a good picture of this... must have been running around!   

Stay tuned for a post about the party decor, and the food setup!

Thursday, February 23, 2012

Puppy!!! and some Floral pieces!

Hi Everyone!!!

Meet Sousa!!!

GOSH I MISS YOU!!!!  It's been forever since I've been able to post.  The holidays were crazy as usual, but there were a few specific things that kept me from crafting/blogging.  I wrote a new curriculum for a whole new course concept at the university where I teach.  Now I am currently teaching that course!  I have done a lot of performing in the last few months as well.  AND even more EXCITING... we got a new puppy!!!!!!!!!!!!!!!!!!!!!!!!!!!!!!!!!!!!!  He is absolutely fabulous and I could gush and gush and gush, but I won't.  or maybe I will......

He's a whippet/lab about 8 months old.  We adopted him on January 4th from Angels on Wheels Rescue.  He is INCREDIBLY smart, very well mannered, and runs like a deer.  Besides being shy with new people/situations he's really doing great. 

This picture is the most exciting one yet.  Last week I introduced him to the CRAFT ROOM!!!!!  Here he's happily chewing on his bone... my sewing machines are to the right in this picture.  This is HUGE because now I can craft with a buddy!  It took a few days and a few squirts of water in the face, but Sousa has finally stopped trying to steal my yarn.  He must think he's a cat....  In case you were wondering that is an Orlando Bloom pillow.  I love my pirates.  =)

~~~~~

I have to include some crafty stuff in this post!!!  These are some of the decorations I made for our Holiday Party in December.  I decorated in silver and purple.  I had a lot of fun and bought WAY too much stuff, but I was pretty happy with how things came out.  These pictures were all taken with my iPhone so I apologize for the quality.


This is a centerpiece over our fireplace.  I found the pitcher in the back of one of our cabinets.  It's silver and needs to be cleaned, but I liked the 'dirty' look of it so I didn't clean it!  Also, I finally learned how to make bows!  Gotta love a purple bow!  At the time I was making these JoAnns had completely run out of greens, so I bought a plain 15 foot garland and cut it up.  That's where the evergreen parts came from.... anyone need any evergreens for an arrangement?  I may have bought TWO 15 foot garlands... yeah... I have a lot of greenery... =)  I can't get enough of those fun purple curly cue.  I definitely put them in everything.


Hmmm how's that get in there?  I mean, seriously, he's so cute!!  This was him sleeping while I was practicing...  I was playing really loud and high and he didn't seem to care!!  (p.s. I'm a clarinetist if you didn't know that.)


This was a project I was especially excited about!!!  I bought these candlesticks at our local thrift store!  It cost me around $4 for all three together.  I promptly spray painted them SILVER! (Diet coke is needed for all crafting after midnight.)


I stuffed the 'hole' with floral goopy stuff (that's a technical term).  Then I filled it with greens, a feather, snowflake, etc (you can see it....)   Anyway, I think they're super cute!  

Okay that's all for now!!  Thanks for sticking around and not 'unfollowing' me for being gone so long.  You all are fabulous people!!  I have much more to share soon!  Take care!

Wednesday, December 14, 2011

French Braid Table Runner ~ the beginning

I have always wanted to do a french braid quilt.  I just love the design!  My dining room is purple, and I found this bundle of great purply fabrics!  So, I thought a table runner would be a great place to start!


At my CMQG retreat I got all of the fabrics out and the fabulous Emily helped me to pick my color run!!  


Then she even gave me the awesome purple for the center squares. 


It will be around 80 inches.  I have a lonnnng dining room table.  =)


It's party done, and I'm so happy with it!!!!  The dark purples are what's left for the ends. 


In order for the center squares to really work the purple had to be just a little bit different than the purples in the fabric.  You can really see it when the dark purple fabrics are added at the end.


I can't wait to finish it!  This pattern is everything I thought it would be.  =)

Tuesday, December 13, 2011

Totebag Tutorial ~ Beginner Friendly!

My best friend recently moved away, and just when she started to want to learn to sew!  I tried to find a good tutorial for her to make a totebag.  Most of them are really great for people who have been sewing a while.  I could not find one that was really detailed enough for a brand new sewer.  Also, some of the more professional bloggers take beautiful pictures, but they are not always functional.  I've even been confused a few times when the orientation of the project is constantly changing in the pictures.  When someone is new (or seasoned!) to sewing the pictures need to be functional!  As a result, not all of my pictures are fabulous or artsy, but I made sure that they are all always showing the project in the same direction and hopefully they show the steps clearly!  Good luck!

Please read all of the instructions before starting your project!  If you have questions don't hesitate to email me!

SUPPLIES:
2 ~ lining fabric ~ 14" x 17"
2 ~ outside fabric ~ 14" x 17"
2 ~ batting (warm & white) ~ 14" x 17"
(alternate options: use fusible fleece, interfacing, or no batting ~ see step 3 below)
2 ~ strap fabric ~ 4" x 32ish" (depending on how long you want the straps!)
2 ~ 1" timex or other woven strap ~ same length as strap fabric
sewing notions/machine/etc


(In this picture I put an extra yellow piece because I intended to do a pocket... then I decided not to in the middle of the process.  Sorry!)


1. Take both batting pieces and set them side by side.  Place your outside fabric on top of batting with the Wrong side down (touching the batting.)


2. Pin in place

  
3. Quilt.  We will be quilting the fabric to the batting.  This step is important because it keeps the fabric from separating from the batting.  I just did a few straight lines that went with the fabric pattern.  You can do as much or as little as you like.


Note: This is a walking foot.  It has "feed dogs" on the foot itself.  It is to help the top fabric move, just like the feed dogs on the machine help the bottom fabric move.  I just got this machine and walking foot from my Grandma!!!  You can still quilt without a walking foot.  I did until now!

Don't want to quilt your bag?
ALTERNATE OPTIONS:
~ You can use fusible fleece!  All you have to do is fuse the fleece (using your iron) to the Wrong Side of the Outside fabric.  With fusible fleece no quilting is needed.
~ You can use fusible interfacing to give the bag some stiffness without the bulk of batting.  Again, you would fuse the interfacing to the Wrong Side of the Outside fabric.


Quilting straight lines.


Quilting done.  You can see what the back of it looks like.  Also, even though I had a walking foot you can see that my fabric shifted a bit!


4. Trim the edges if your fabric shifts like mine did!


5.  Now take your Lining Fabric and place it on top of your Outside Fabric.  Place the RIGHT SIDES together.  (Lining fabric right side down, outside fabric right side up.)


6.  Sew across the top of the bag ONLY.  No need to backstitch because you'll be sewing over this seam later.


7.  Flip the lining up as shown.  You should be looking at the right side of the Lining and the right side of the Outside.


8.  Press the seam.


9.  Flip the lining under.  Now it is a sandwich with the seam at the top (outside fabric, batting, lining)


10.  Press that as well.


11.  Now topstitch about 1/8" from the edge.  Sew across the top Only!


12.  After topstitching open up the piece again.  You are looking at the right side of the lining and the right side of the outside piece.


13.  Take your other rectangle and place it on top.  Right sides together!!  The lining touching lining, and the outside touching outside


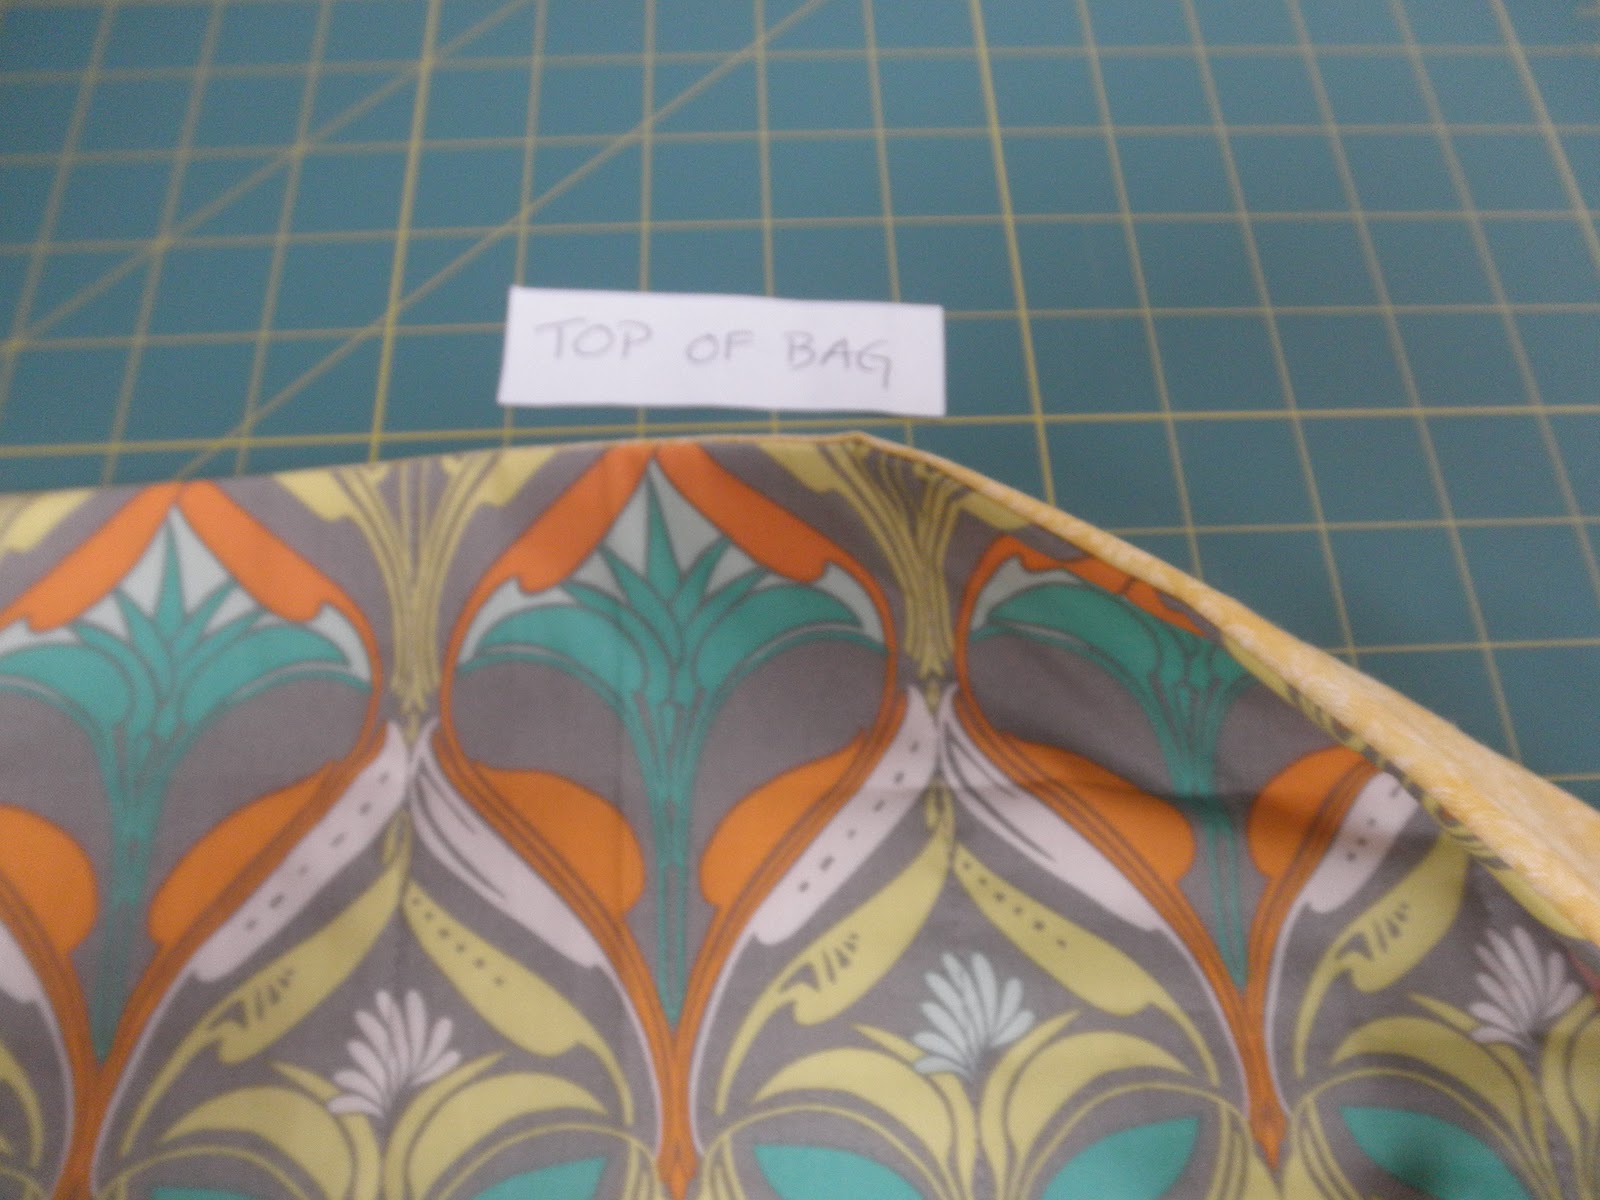
14.  Pin in place all the way around.  Be careful to make sure that the seams match up at the "top of bag" (notice my sophisticated sign).


15.  Start sewing at the 'bottom' of the lining.  Backstitch where my 'start sewing here' sign is and then sew to the right.  Sew all the way around stopping about 4inches from where you started.  This will leave a space to turn the bag rightside out.

Note: TURNING CORNERS


When you turn corners you leave your needle down in the fabric at the corner.
 

Lift the presser foot and then carefully turn your fabric!


Lower the presser foot and start sewing again.


Your opening should look something like the picture above.


All sewn up! (and blurry, whoops.)

IF YOU WANT TO MAKE A BAG WITH A 'BOTTOM' SCROLL DOWN.
If you want to make the bag with no flat bottom continue reading below.


16a.  Clip the corners to reduce bulk when you turn it rightside out.


clipped!  Also, trim any seam allowance that is over 1/4".


bone folder!  Your 'pushing out corners' friend!


17a.  Turn the bag right side out through the hole and then use the bone folder to push out the four corners.


You still have to sew up the opening!


18a.  Fold the fabric under a bit and then press


19a.  Sew across, backstitching at the beginning and end.  You should use a coordinating color, but I wanted to make sure you could see the stitch in the picture.  (and maybe I was too lazy to change my thread....)

Note: I always make sure that I start sewing ontop of the old seam to prevent holes.  In other words, if your opening is 4 inches then I sew a 6 inch line across.


20a.  Stuff the lining inside the bag!


Done!!!

Time to make straps!!!  See my Strap Tutorial Here!


TO FINISH WITH A BOTTOM
You have sewn all the way around the bag with right sides together, but you have not turned it rightside out yet.


16b.  Go to your corner!


17b.  Lift it up!


18b.  Pull the 'non seam' parts apart.


19b.  Match the seams up on either side of the triangle you have created.


20b.  Use your ruler to decide where to draw your line.  My bottoms are 2 inches.


21b.  Draw a line and pin.  Repeat for ALL FOUR corners making sure they are all the same!  The line you draw should be the same length on each corner.


22b.  Sew across the line backstitching at the beginning and the end.


tada!


23b.  Cut off the triangle!

24b.  Turn rightside out as show earlier.


This is what your corner should look like!


25b.  Sew up the hole in the lining as shown earlier (Step 18a).  Then stuff the lining inside the bag!

yay!  Now you have a bag with a bottom!!!!

Time to make the straps!