 Red bags sewn and turned (not filled). Blue bags cut out!
Sunday, June 26, 2011
Bags!!! (or baggo, cornhole)
On Father's Day we were hanging out with my hubby's parents. They were playing "baggo" and saying that they had misplaced a bag, and the rest were moldy. Of course, instantly I saw this as a fun new project for my serger!! I did a bit of research and made a bunch of bags!! I did it quickly (and forgot to take a picture in the end). It worked out great. I'm out of town this week, but when I get back I'll put up a tutorial. =)
Red bags sewn and turned (not filled). Blue bags cut out!
Red bags sewn and turned (not filled). Blue bags cut out!Monday, June 20, 2011
Guess what was in the mail!!!

I'm happy to report that my new One Yard Apron pattern came in the mail today!!! I ordered it from Material Girls. It's a fabulous pattern by Lori Holt of bee in my bonnet. Hop on over to her blog to see all the great pictures of these aprons. The pom-pom trim is my favorite!
I just received a gift card for my favorite quilt shop from my awesome Mother in Law for my birthday! I can't wait to go buy some fabric for these aprons! Who wants one?
Saturday, June 18, 2011
FNSI ~ Bargello Placemats
I decided to do something crazy last night! I actually took out an UNFINISHED project!!! I tried these placemats a few years back and I only finished 3. Last night I finished piecing the other three!!!! Now all that is left is binding! I used the pattern from the book Bargello Quilts by Marge Edie. It was a great way to try Bargello without it being too much of a project. I definitely have some "parallelograms", but I guess that's life!!
I picked out the colors to represent the "Illini" at the University of Illinois! =)


I picked out the colors to represent the "Illini" at the University of Illinois! =)


Friday, June 17, 2011
FNSI
So My Hubby is leaving me all by myself tonight and I was planning on sewing! As I was looking through some of my favorite blogs I found out that tonight is "Friday Night Sew In" night! yay! There's other people like me!! (It's so comforting.) Basically I'll be in my pjs with a cosmo and sewing all evening. I have so many projects to finish I'm not quite sure what I'll do...
All you have to do to participate is go to Crafty Vegas Mom to sign up. Then tomorrow (sat) post pictures of what you made on their flikr group.
Yay! I'm off to sew....
All you have to do to participate is go to Crafty Vegas Mom to sign up. Then tomorrow (sat) post pictures of what you made on their flikr group.
Yay! I'm off to sew....
Sunday, June 12, 2011
Curtain / Blanket

My Grandmother made me a Fantastic quilt using 30s reproduction fabric for my bed. I absolutely love it. I was in need of curtains for my room, but I could not find anything I liked soo..... I asked my Gram for all of the extra scrap fabric from my quilt. My plan was to make four curtain panels, two for each window.
Two panels are completely done.... then I got married and moved. BUT in my planning, I decided to make the curtains double as blankets.
I'll throw up a tutorial soon, but basically I used flannel as the back (the blanket part) and muslin in the center. I spent a few days cutting 3.5 inch squares. I pieced 15 columns of 13 squares each. Then I sewed each column to the muslin/flannel. Therefore no quilting is needed. (Bargello style without the offsetting...). I threw a binding on and done! As I said I'll put a tutorial up later when I finish Curtain/Blanket Number three! Here are some pics!
 It's hard to see, but there are vertical lines on the flannel where I sewed on each column of squares.
 I did lay out all of the square first so that there wouldn't be any matching colors or squares.
Saturday, June 11, 2011
Heating pad
I should be cleaning.... but I'm taking a break.... here's what I did last night!

I've been wanting to make some heating pads as gifts for a long time now. A few weeks ago during a teaching break I hunted on the web for ideas. Just when I thought I'd have to come up with a pattern on my own I found a fabulous tutorial at The Green Wife's blog!
To fill the bag I used rice and I found Lavender Essential Oils at Whole Foods. In her blog she doesn't mention how much Lavender to use. I made two heating pads at the same time, so I had 9 cups of rice and I used 6 drops of oil. I think it was a good amount, but only time will tell!!!
Reasons I liked this tutorial (besides it being easy to understand):
1. She used flannel! I was happy to find some cute flannel on sale at JoAnn's. Sadly, my local quilt shop doesn't carry Amy Butler flannel.
2. She sectioned the rice off. Some of the others I have found were just long tubes, and then the rice doesn't evenly distribute itself.
3. I got to use my new serger!!! No rice will be escaping these heating pads!!!!
4. It is the perfect size.
 It happily rolls up for easy storage!
Friday, June 10, 2011
My Somewhat DIY Wedding (part 6 of infinity) : PLACE CARDS


Another fun part of my wedding were the place cards! I had fun making them, and I think all of my helpers did too. I got inspiration from my friend Ellen's place cards (I can't find a picture of them on her blog...). All of my tables were monochromatic so the table cards were pink, yellow, and red to go with the tables.

The Cards were 3 x 6 inch rectangles and then folded in half. The white/yellow paper was just slightly smaller. The Names were printed on card stock and then punched out with "Modern Label Punch" from Stampin' Up. Both the flower and the name were mounted with foam mounting squares to give it dimension. Oh, and the flower was from the "Blossom Party" die cut from Stampin' up. I had to add a sticky gemstone for some bling!

The inside were regular address labels with the guest's table number.
Tada!!!
Tada!!!
My Somewhat DIY Wedding (part 5 of infinity) : THANK YOU CARDS


I really wanted to personalize everything for my wedding. I know that people spend a lot of time picking out gifts, and other people spent tons of time planning wonderful showers, etc for me. In an attempt to show some appreciation I decided to make all of my Thank You cards for my showers.
My friend Ellen helped me so much with this process. She is a Stampin' Up consultant and I ended up buying a Big Shot and all kinds of fun die cut stuff... not to mention tons of paper and ink (that I used for my invitations... for another post). Visit her blog to see all the fun stuff she makes.
I bought packages of blanks cards and envelopes 50% off at JoAnn's. Then I used the Big Shot and cut out all of these awesome 'flower parts' using the "Blossom Party" Die Cut set from Stampin' Up. (Well, my sister did the die cutting...)
The parts look like this....

My lovely helpers and I just put them all together in fun combinations.


All that was left was stamping a little "thank you" stamp for the finishing touch. They were simple and cute!!!
Thursday, June 9, 2011
Napkins
GUESS WHAT!?!?! I tried out my Brand New Serger last night!!!! It was fabulous. =) I even threaded it all by myself. My first project : Napkins. My husband picked out the fabric months ago. At that time I made up about half of the napkins by folding the seams over and topstitching. The other half were never finished so I thought it would be a great first project for my serger. Using my new serger.... the Brother 1034d 3/4 Lay In Serger..... was an awesome experience. It was SO fast. I used the 'rolled hem' feature and they came out beautifully. I learned that turning the corners is a bit of a challenge, but I got better with each one....after I read a little tutorial online.
 Four of my napkins with teal hemline.
 Front and back of stitch... not that the picture is good enough to really see!
 Four of my napkins with teal hemline.
 Front and back of stitch... not that the picture is good enough to really see!
 Wednesday, June 8, 2011
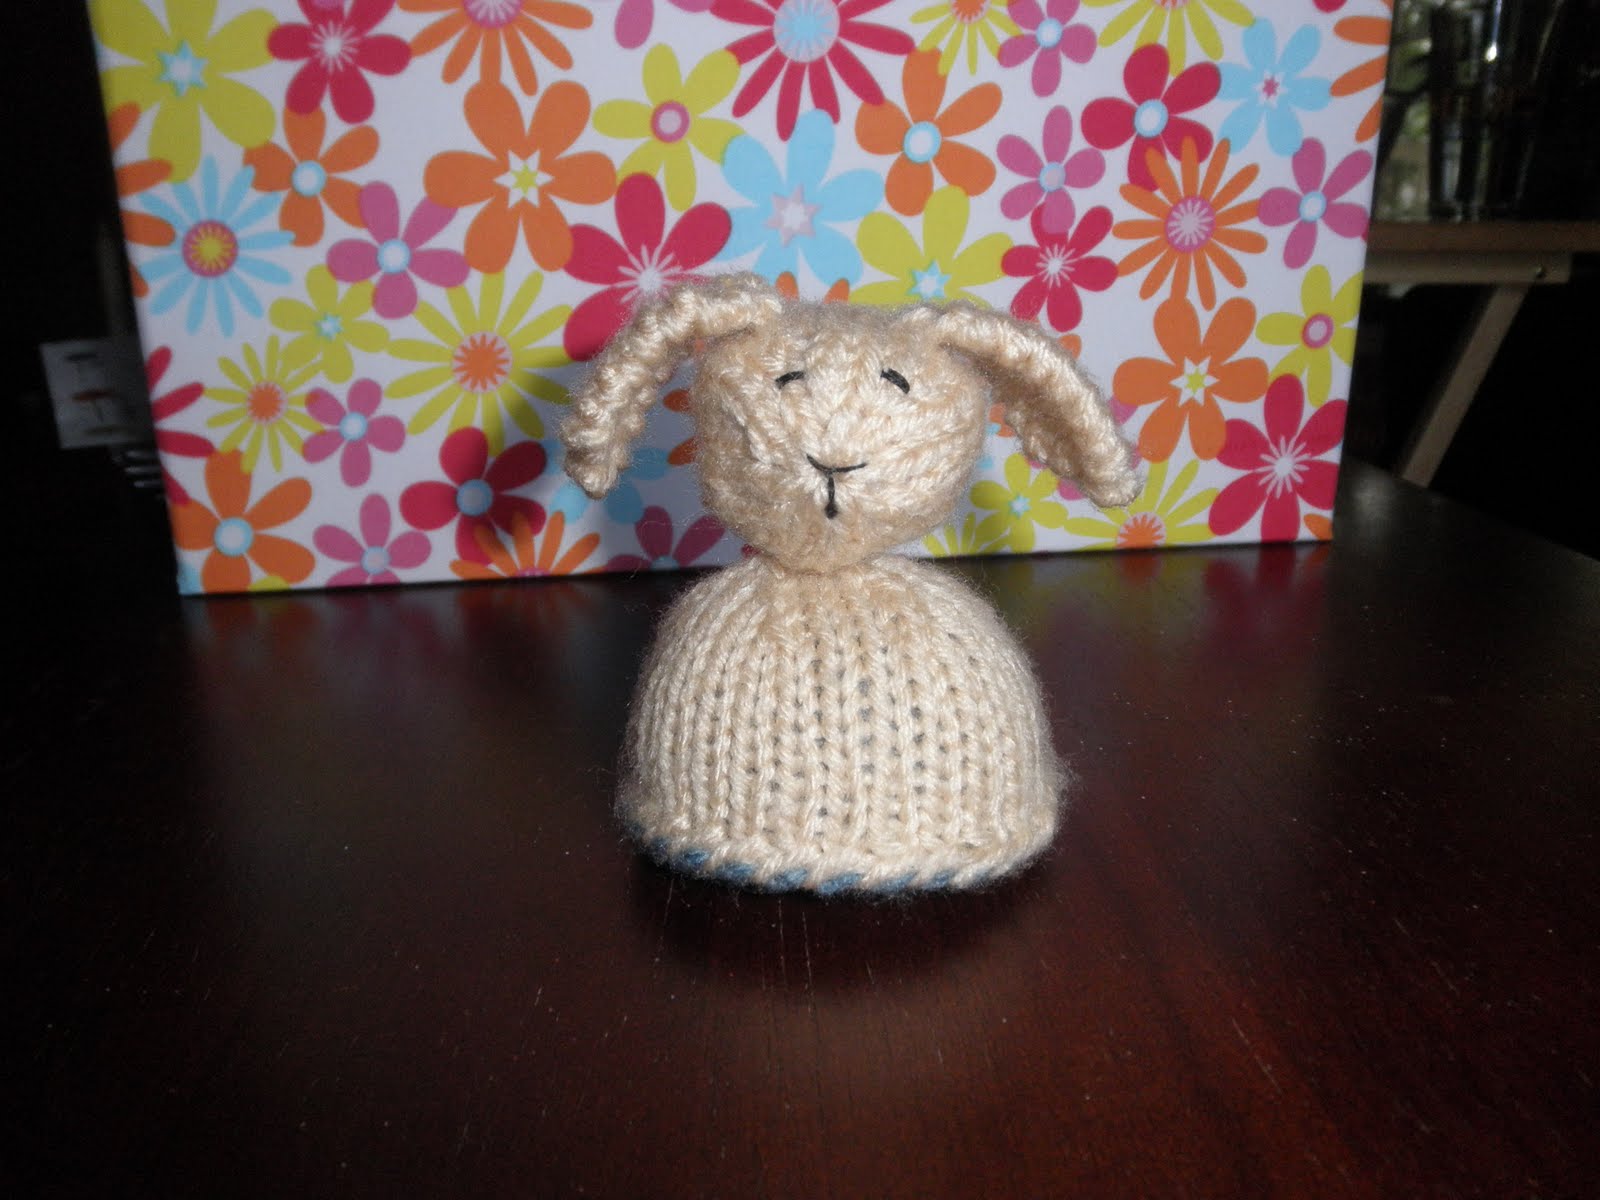
Duck / Bunny
My sister and my husband's sister both graduated from college on the same weekend. The drive was a bit long and the ceremonies were great! I have been to many graduations in my time and so I brought a little project to do while the names were being read. I saw this great knitted toy on my friend A's blog and just had to make one!!! It proved to be the perfect little project for the car (and the graduation ceremonies!) The pattern is free at Spud & Chloe. It is a reversible knitted toy! One side is a duck and the other is a bunny!
 The Bunny
 The Duck
 The Bunny
 The Duck
Sunday, June 5, 2011
My Somewhat DIY Wedding (part 4 of infinity) : CENTERPIECES


I wanted to make my own centerpieces for my wedding because I thought it would be fun, and save money. It turned out to be both!
My cousin saved me a bunch of Enfamil baby formula cans. I was planning on covering them with paper or fabric, but when we took off the labels we discovered a beautiful silver!!! =) No covering necessary!!!
I purchased all of the flowers and ribbon from Hobby Lobby 50% off. I watched the sales for a few months.

My tables were monochromatic : yellow, red, & pink. My sisters helped me put the ribbon on the cans. We just used basic glue (and they got some sticky fingers...) In hindsight Tacky Glue would have been a better choice. We covered up the seams by gluing on a monogram.
My mom did the finished touches. She sponged the edges of monograms with matching ink, she secured the ribbons on floral stakes so they would stay put, and she added the extra greenery, and bling. She arranged the flowers and they all looked great!

I wanted some 'bling' in them as well and when we looked at Hobby Lobby everything was either too gaudy or totally expensive. As a result I bought some wire and beads and made my own bling to go in the center.
 To make a little 'bling' :
2. Put a bead in the center of the wire.
3. Bring the two ends of the wire together (keeping the bead in the center)and twist very close to the bead. This keeps the bead in place. About four or five twists do the trick!
4. Then 'branch' out and continue adding beads and twisting wire! tada!
All in all I think they turned out great!

Friday, June 3, 2011
Goodwill Fun!!!
I needed a small bookshelf to store my fabric....
I found one at Goodwill for $2.99!!!!! It just needed a little love.
 So I spray painted it Dark Purple!!! WAHOO!
(It's a bit deeper purple than the picture shows.)

I went to HomeGoods in search of a small table for my new Serger. Every small sized table they had was between $50 and $100. Definitely not okay. At Goodwill I found this Actual School desk for $4.99!!! I win!!! It's the perfect size and sturdiness. It's also nice to have a table with legs that don't have any cross bars. It makes it easier to access the foot pedal. The height is adjustable too! AND there's a secret compartment inside... =) It just needed a little cleaning up.....

So I spray painted it PINK! And then sprinkled some glitter on top. =) Perfect!
 Spray paint is my new best friend.
My Somewhat DIY Wedding (part 3 of infinity) : 'LOVIE' BLANKET
Our lovely niece was the flower girl for our wedding. She needed a special gift! I did some online searching of 'lovies' and 'blankies' and took notes from ones that I liked. Then I just went for it. I found THE SOFTEST fabric at the quilt shop. It is like rabbit fur in swirls! It's the main fabric in the picture below. It's so awesome that I bought a ton of it and just might make a lovie for myself!


She loved the feel of the satin flower so I decided to make the other side out of extra satin from the table runners that I made (will post in the future). I carried the satin over to the other side so there would be no seam on the edge. The satin was already cut into thin strips so I improvised and pieced a bit of flannel in the center. Good old SteamASeam and a satin stitch attached the felt "A" in the middle. All in all it worked out pretty well! =) The pictures really don't do it justice.
Subscribe to:
Posts (Atom)