

I have so many projects going right now... I'm sure I'm the only one, right? ha! Anyway, I wasn't sure what I wanted to work on for the Friday Night Sew In. I ultimately decided to do something for myself!!! Kate of See Kate Sew put up a GREAT pattern for her adorable Sweet Scallops Totebag that you can get here.
I've been envisioning the fabrics I'd use all week. SO I went for it!!!
Kate's pattern and tutorial are awesome!!! I only did a few things differently.
I had a great time picking my fabrics!!! I marked the scallops instead of cutting them out. I know its an extra step, but its just easier for me to sew these curves when the fabric is square, and not 'wiggly bias'.

I just kept sewing and sewing! Yay curves! =)

I then turned them inside out and clipped, etc. Arranged and sewed them down just like Kate in her tutorial.
I used linen for my bag because I didn't have any home decor fabric. To make it more sturdy I used some Pellon 911FF Fusible interfacing. I don't know if that's the best for bags... its just what I had around!

I'm a bit picky about my straps. I really like straps for bags to 'hold up'. I like using pretty fabric and I don't want it all to 'bunch up' from use.
SO, this is how I make my straps!!!!!
I use 1 inch timtex and cut it to size (I did 34" for this bag... maybe a bit long for some, but I like them)
Then I cut my fabric 34 1/2 inches by 4 inches

Fold over the top edge 1/4 inch and press.

Then fold in half and press to create a crease.

Open it up and press both edges into the center. I don't go all the way to the crease... maybe just about 1/4 inch from the center crease.

Unfold everything and put your timtex under the 1/4 edge and along the center crease.

Fold over the right edge on top of the timtex.

Fold over the left edge towards the center.
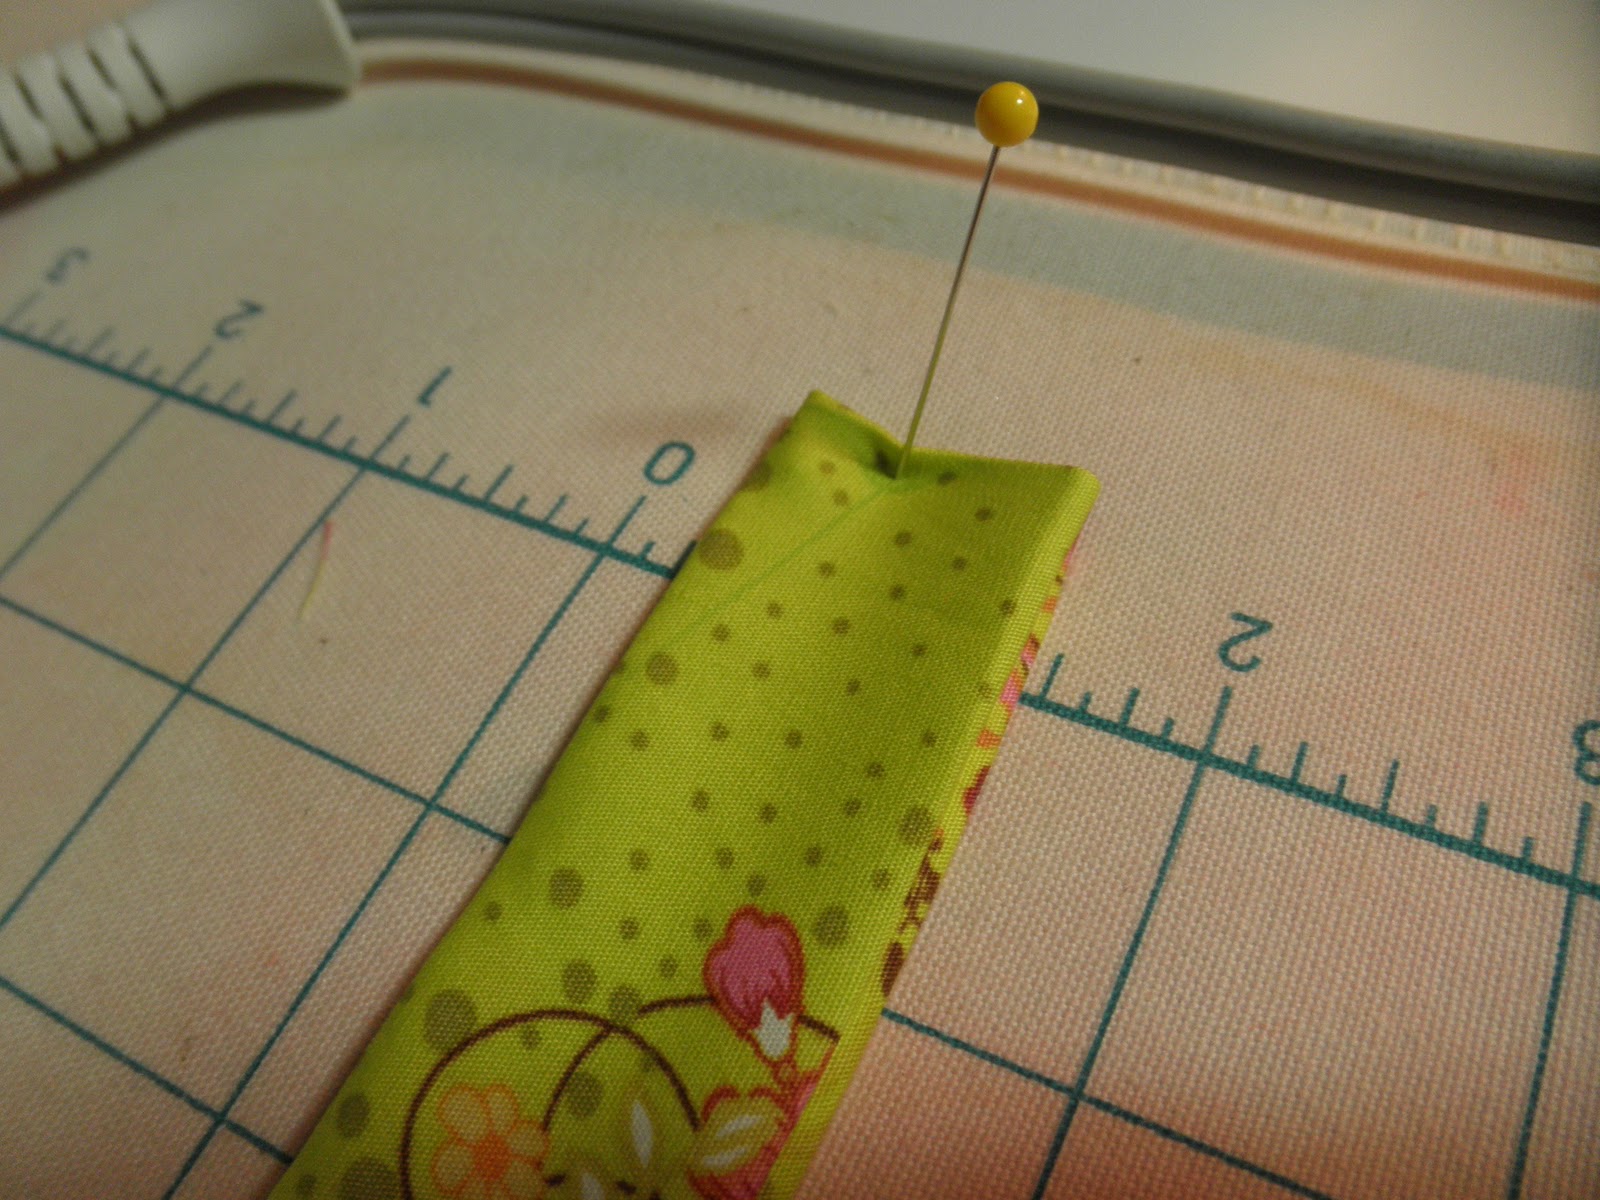
Then fold on the crease! Tada!

pin!

Repeat the same for the bottom. Now you have a finished edge so you don't need to 'turn it under' when sewing to the outside of the bag.

Sew the entire length of the strap about 3/16ths from each edge. =)

Sew down onto your bag, using an "x" or however you like to do it!
AND THE FINISHED BAG!!! yay!!!!

View from the bottom

View from the side!

The back!! I just couldn't leave it blank.
I used my sizzix and some fusible web to make circles from my scallop scraps.

So excited! You should make one too!
11 comments:
I am thinking I am going to have to make one! This would be a really cute bag for a little girlie's dance stuff or piano books or whatever! I definitely like your reinforced straps, too! Now I have lots of ideas for color combos in my head when I should be thinking about science. Darn.
This is adorable!! I love the fabrics you chose and the printed handles! So lovely, thanks for sewing along!
What a cute pattern you chose for your bag. And a great finish for FNSI.
Cute! I would have sewn first, then cut out the scallops, too. Bias can be such a pain.
Cute bag! I'm going to have to check out that tutorial. I agree about marking the scallops. I hate trying to sew around them once they are cut!
Love the bag! Great job with it! Thanks for sharing! I'm your newest follower! Have a Great Day! :)
A very productive FNSI! That's a great way to do a strong handle.
What a neat looking bag, I love the scallops and your colors are perfect!
Quilting by the River
sweet...love the fabric!
Lovely - and thanks for the tutorial. I haven't tried this technique yet - it looks wonderful.
Love for you to link up at:
"Made by ME" Linky Party at JAQS at http://www.jaqsstudio.com/2011/10/made-by-me-4-linky-party-and-features.html
Thanks for linking to Take-A-Look Tuesday - you were featured today!
Mandy, www.SugarBeeCrafts.com
Post a Comment